Real Time Baby Monitor Chrome Extension - Streaming from Raspberry PI using SignalR and Cognitive Vision Service
SignalR Streaming is a latest addition to SignalR library and it supports sending fragments of data to clients as soon as it becomes available instead of waiting for all the data to become available. In this article, we will build a small app for baby monitoring to stream camera content from Raspberry PI using SignalR streaming. This tool also sends the notification to connected clients whenever it detects baby cry using Cognitive Vision Service.
Overview
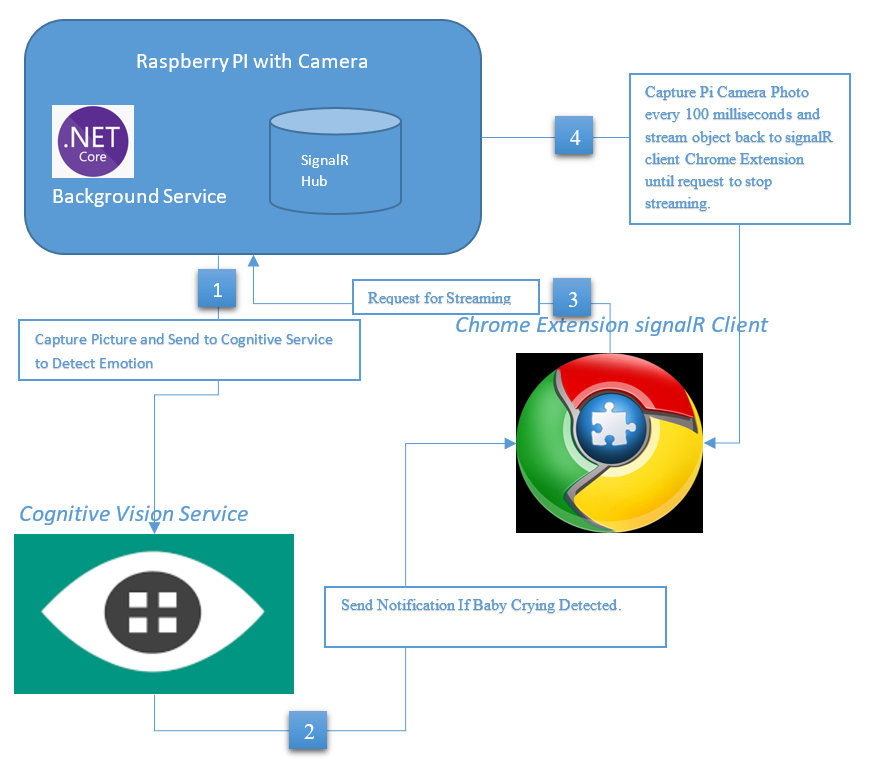
This tool consists of following modules.
SignalR Streaming Hub which will holds the methods for streaming data and notification service.
.Net core based worker service that runs in the background thread to detect baby cry by capturing a photo in frequent interval and pass it to cognitive vision service.
Azure based cognitive Vision Service will take the image input and detect if any human face exists and then analyze the face attributes and sends the response back with face attributes values such smile, sadness, anger etc..
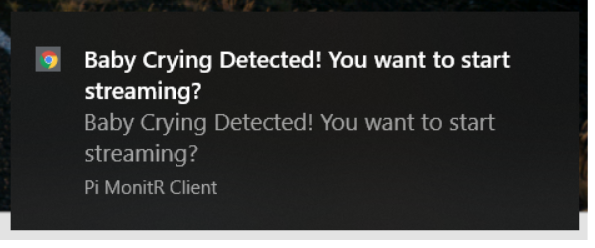
SignalR Client is a Javascript based chrome extension runs in chrome browser background. When SignalR Hub sends the notification messages, this will show the popup notification to the user. User will also have the option to view the live streaming from client Popup Window.
Demo
Prerequisites and Dependencies
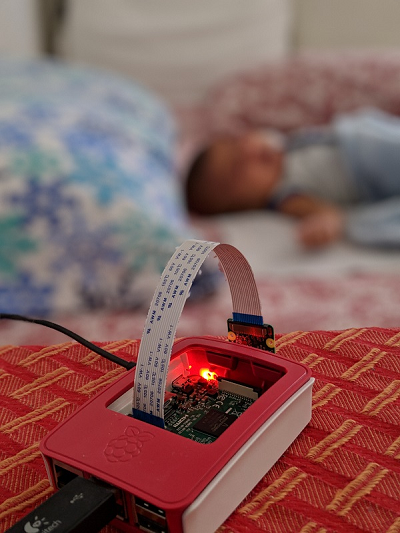
- Raspberry PI 3 with Camera Module (Any Version with camera module port)
- Azure Portal Account - Cognitive Vision Service (Free tier)
- MMALSharp - Unofficial C# API for the Raspberry Pi camera.
- Microsoft.Azure.CognitiveServices.Vision.Face Nuget Package.
Steps
PiMonitR SignalR Hub
PiMonitRHub is streaming hub which holds streaming methods startstream and stopstream. When the SignalR client invokes the startstream method, it calls the camera service to capture the photo and send it to client by writing into channelwriter. Whenever an object is written to the ChannelWriter that object is immediately sent to the client. At the end, the ChannelWriter is completed to tell the client the stream is closed by writer.TryComplete Method.
public class PiMonitRHub : Hub |
PiMonitR Background Service
PiMonitRWorker is a worker service inheriting from background service. It starts the new thread whenever application is started and execute the logic inside the ExecuteAsync method in frequent interval until cancellationtoken is requested.
internal class PiMonitRWorker : BackgroundService |
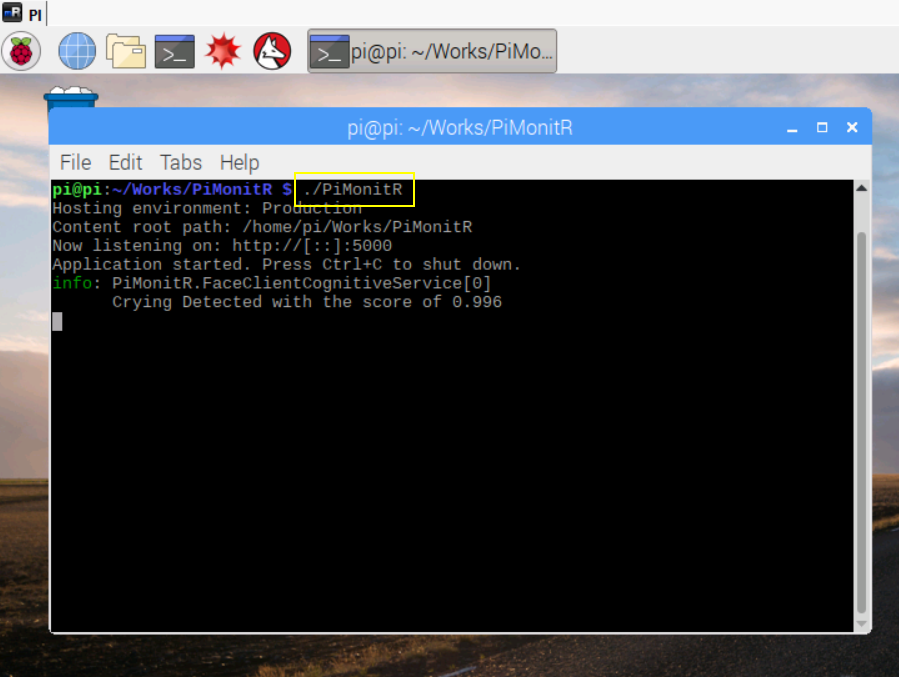
In this worker service, it capture the photo using camera service and sends it to cognitive service API to detect the baby cry. If the baby cry is detected, notification hub method will broadcast the notification message to all connected clients. If the client is already watching the stream, this background service will not detect the baby cry until the user stopped watching the stream to avoid duplicate notification to the users.
Cognitive Vision Service
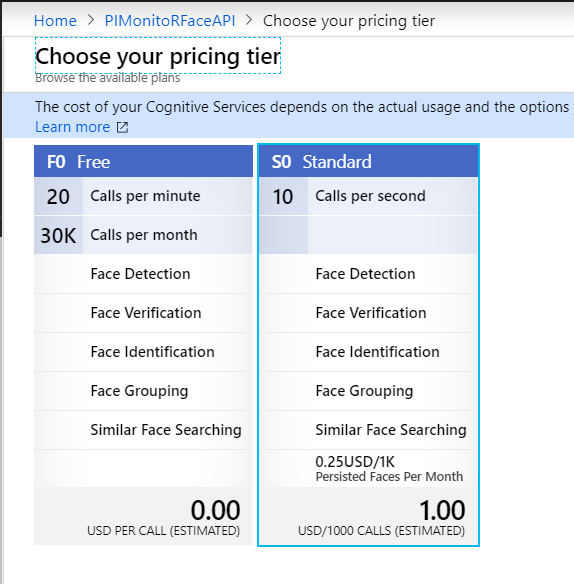
Microsoft Cognitive Service API is very powerful API to provides the power of AI in few lines of code. There are various Cognitive Service APIs are available. In this app, I will be using the Cognitive Vision API to detect the face emotion to see if the baby is crying or not. This API will analyze the given photo to detect, recognize the human face and analyze the emotion face attributes such smile, sadness etc.. Best of all, this service have free tier which allows 20 calls per minute so we can get started without paying for anything.
After you register the cognitive service in Azure Portal, you will get the API end point and the Keys from the portal.

You can store the Keys and EndPointURL in to UserSecrets / AppSettings / Azure Key Vault so that we can access it from configuration API.
public class FaceClientCognitiveService |
- Install the Microsoft.Azure.CognitiveServices.Vision.Face nuget package to install the FaceClient.
- Before, making the API call, set the face attributes parameters to return only emotion attribute to avoid returning all the data.
- Face API has got so many face attributes for the identified face. But, for our app, we use the emotion attributes of Sadness, Anger, Fear .
- If any one of above mentioned attributes are higher than 0.5 limit, this method will return true.
- I came up with 0.5 as a limit for these attributes. However, you can change the value or attributes that works for your use case. I have tested with few crying images and my limit works fine for all those cases.
PiMonitR Camera Service
I am running my Rasperry PI with Raspian OS which is based on Linux ARM architecture. The camera module has built in command line tool called raspistill to take the picture. however, i wanted to use some C# wrapper library to capture picture from PI and found out this wonderful open source project called MMALSharp which is an Unofficial C# API for the Raspberry Pi camera and it supports Mono 4.x and .NET Standard 2.0.
I installed the nuget package of MMALSharp and initiated the singleton object in the constructor so that it can be reused while streaming the continuous shots of pictures. I have also set the resolution to 640 * 480 for the picture because the default resolution is very high and file size is huge as well.
public class PiCameraService |
Publish Server App to Raspberry PI
Now, that we are done with server side app coding for, our next step is to deploy it into Raspberry PI. In order to publish the app into PI, there are two different ways to publish it.
- Framework Dependent - It relies on the presence of a shared system-wide version of .NET Core on the target system.
- Self Contained - It doesn’t rely on the presence of shared components on the target system. All components, including both the .NET Core libraries and the .NET Core runtime, are included with the application and are isolated from other .NET Core applications
I used to self containment deploy so that all the dependencies are part of the deployment. The following publish command will generate the final output with all the dependenices.
dotnet publish -r linux-arm |
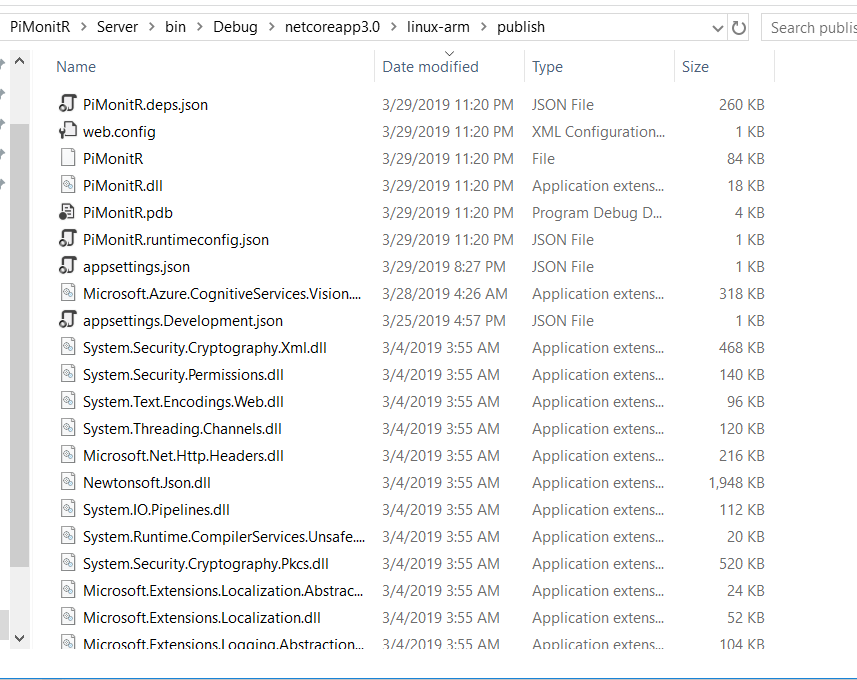
You will find the final output in the linux-arm/publish folder under bin folder. I used Network file sharing to copy files into raspberry PI.
After all the files are copied, i connected my raspberry PI through remote connection and run the app with the following command in the terminal.
PiMonitR Chrome Extension SignalR Client
I decided to go with chrome extension as my signalR client because it supports real time notification and also it doesn’t need any server to host the app. In this client app, i have background script which will initialize signalR connection with hub and runs in background to receive any notification from hub. It also has Popup window which will have start and stop streaming button to invoke the streaming and view the streaming output.
manifest.json
manifest.json will define the background scripts, icons and permissions that are needed for this extension.
{ |
background.js
// The following sample code uses modern ECMAScript 6 features |
background.js will initiate the signalR connection with hub with the URL defined. We also need signalr.js in the same folder. In order to get the signalr.js file, we need to install signalr npm package and copy the signalr.js from node_modules@aspnet\signalr\dist\browser folder.
npm install @aspnet/signalr
This background script will keep our signalR client active and when it receives the notification from hub, it will show as chrome notification like below.
popup.html
|
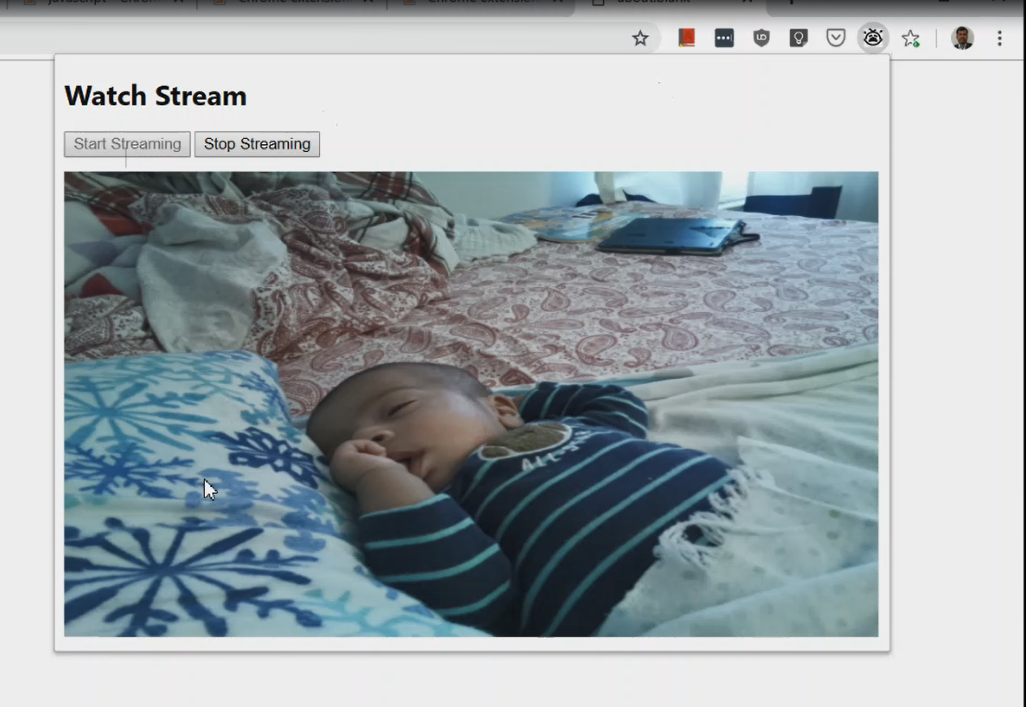
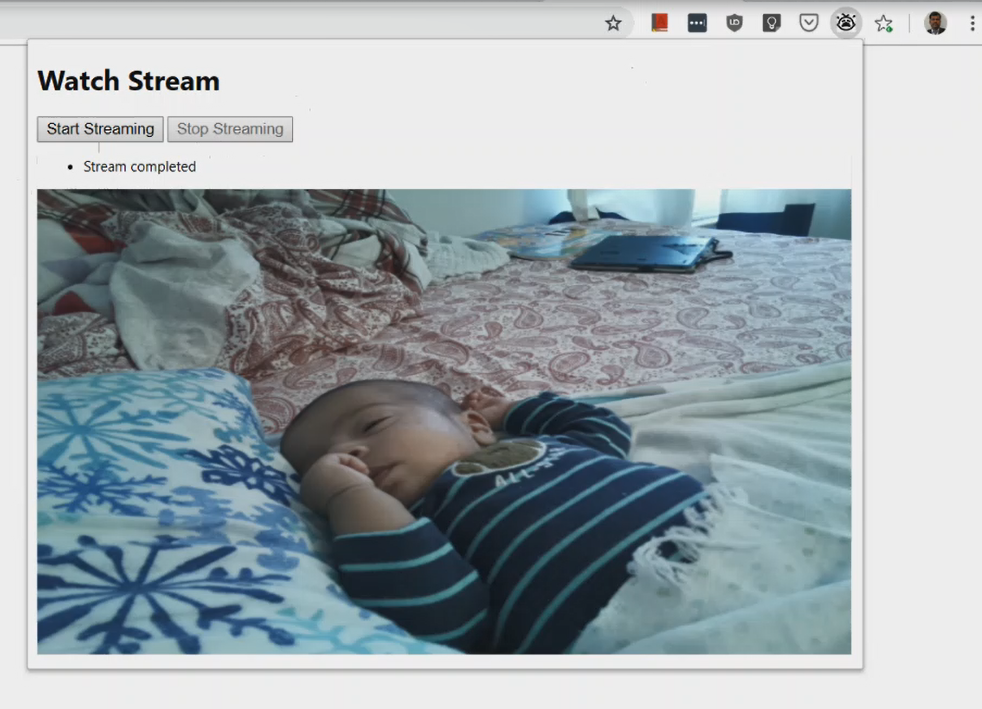
popup html will show the stream content when the start streaming button is clicked. it will complete the stream when the stop streaming button is clicked.
popup.js
var __awaiter = chrome.extension.getBackgroundPage().__awaiter; |
When the user clicks the start streaming button, it will invoke the stream hub method (StartStream) and subscribe to it. Whenever hub sends the data, it receives the content and setting that value directly to Image src attribute.
streamContent.src = "data:image/jpg;base64," + item;
when the user clicks the stop streaming button, client invoke the StopStream hub method which will set the _isStreamRunning Property to false which will complete the stream.
Conclusion
This is a fun project, i wanted to experiment with signalR streaming and it worked as i expected. Soon, We are going to have lot more new stuffs coming in SignalR (IAsyncEnumerable) which will make even better for many other real time scenarios. I have uploaded the source code in my github repository.
Happy Coding.
i am a huge fan of signalR. Today, David Fowler, the creator of signalR mentioned my tweet in his timeline and i am so happy for that. This made my day. :)