How to Create Personal Blog using Hexo and Netlify With Continuous Deployment
Recently, I moved my blog from blogger to hexo blog framework hosted in Netlify. The main reason i moved my blog to hexo because its simple yet powerful blog framework for static html generator with markdown support for articles and so many themes and plugins available for blogging platform. When my blog was hosted in blogger, I faced lot of difficulties in formatting the content and code blocks for almost all the articles. I spend more time in formatting the article instead of focusing on content of the article. I wanted to move to some blog framework that must support markdown and ability to host the content free of charge with continuous deployment enabled. There are various popular static html generator framework available in the market such as hugo, jeykill and hexo. After my initial research, i decided to go with hexo framework and use Netlify for hosting my blog since its free and supports continuous deployment.
Steps
Installing and Configuring Hexo Blog Framework
To Setup the hexo blog framework in your machine, you have to first install the latest nodejs and Git on your machine. Run the following command to install the hexo framework.
npm install -g hexo-cli |
After the hexo installed on your machine, run the following command to initialize the hexo.
$ hexo init <folder> |
After the installation is done, the basic project folder will be created with the following structure.
. |
_config.yml will hold all the configuration related data for your blog. You can modify the blog title, description , keywords etc.. This also holds the details the current theme, additional plugin details installed in your website.

Setup and Configure Hexo Theme - Next
There are plenty of themes available for Hexo and i decided to go with one of most popular theme called Next. I also liked icarus theme but since it has three column layout, i decided to go with Next theme. It has four different theme layout to customize and also light and dark mode for code blocks. To install the theme, just navigate to the site root directory and clone the git repository using the following command.
$ git clone https://github.com/theme-next/hexo-theme-next themes/next |
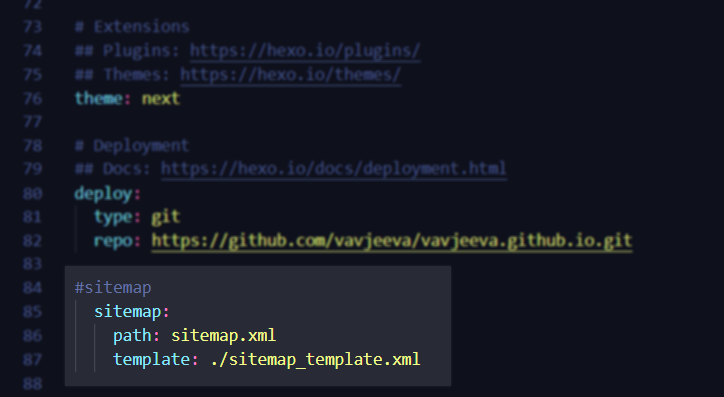
Once the theme is installed, change the theme name to Next in _config.yml in the site root directory.

You can customize the theme settings by changing the _config.yml inside the themes\next directory. All the customization details are available in https://theme-next.org/docs/theme-settings/.
Install and Configure Additional Plugins
I have installed the hexo sitemap plugin to generate the sitemap.xml file automatically. There are lot other good plugins available in the official site.
Create a New Post and Run Locally
To create a new post or a new page, you can run the following command:
$ hexo new [layout] <title> |
post is the default layout, but you can put page if you want to create a new page. You can also change the default layout by editing the default_layout setting in _config.yml.
Once the new post is created, markdown (.md) file will be created under source\_posts folder with the default front matter. you can use any markdown editor to start creating articles. Here are some of the online and offline markdown editor which are most popular among users.
- stackedit.io (Online Editor)
- https://typora.io/ (Offline Editor)
After we create the article, we can generate the static html by running the following command.
hexo generate |
This command will generate the static html files and all the necessary supporting files (javascript, css) in the public folder. We can run it locally to verify the page by running the following command.
hexo server |
This will run the nodejs server in default 4000 port. You can verify your blog by running http://localhost:4000 in the browser.
Setup Automatic Deployment to Netlify
We have successfully created our website in local, it is time to deploy our website into Netlify hosting. I choose Netlify instead of github pages because it supports CI/CD pipeline to deploy the site automatically whenever i commit the changes into my github repository. Also, Netlify free account features are sufficient for running any personal blog.
Signing up with Netlify is pretty straightforward. You just have to link with your github account to sign up the account.
After you signup with Netlify, create a new repository in github to push the code base into github. Once the repository is created, copy the remote repository URL to setup the remote origin branch from local.
Navigate the local root directory and Initialize as a Git repository.
git init |
Add all the files from your local repository and commit it locally
git add . |
Now, setup the remote origin with the following command.
git remote add origin Git_Repository_URL |
Now, you can push your local changes to git repository with the following command.
git push -u origin master |
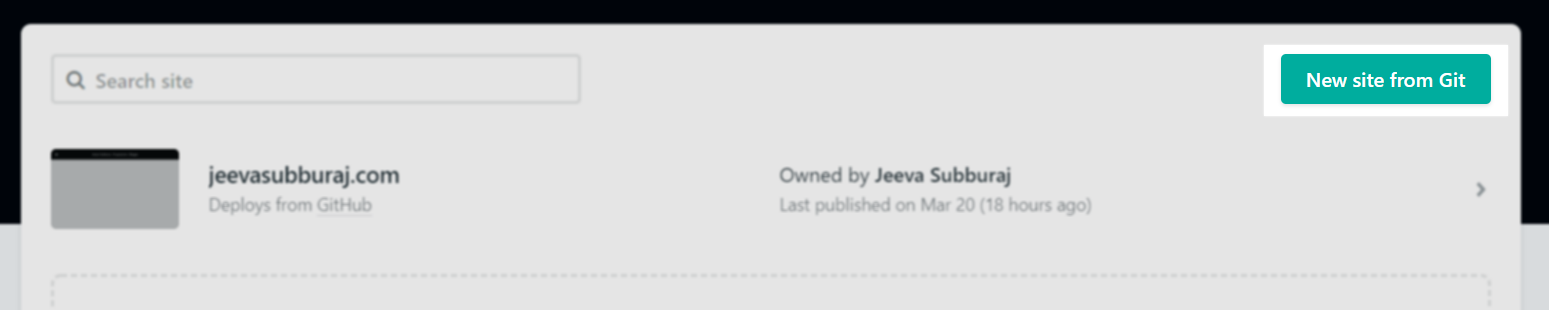
Now. login to Netlify and click create new site by clicking New Site from Git button.
Link your github repository from the next page for continuous deployment.

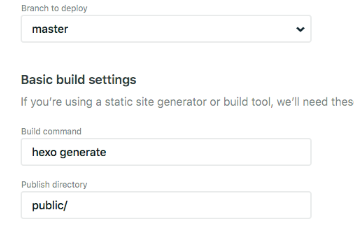
You have to authorize Netlify to access your github repository. After you authorize it, you have to choose our website repository and the branch. As part of last step in the wizard, netlify automatically identifies hexo blog and put the hexo generate build command and the default publish directory.
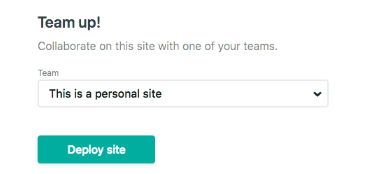
Click Deploy site to finish creating automatic deployment setup.
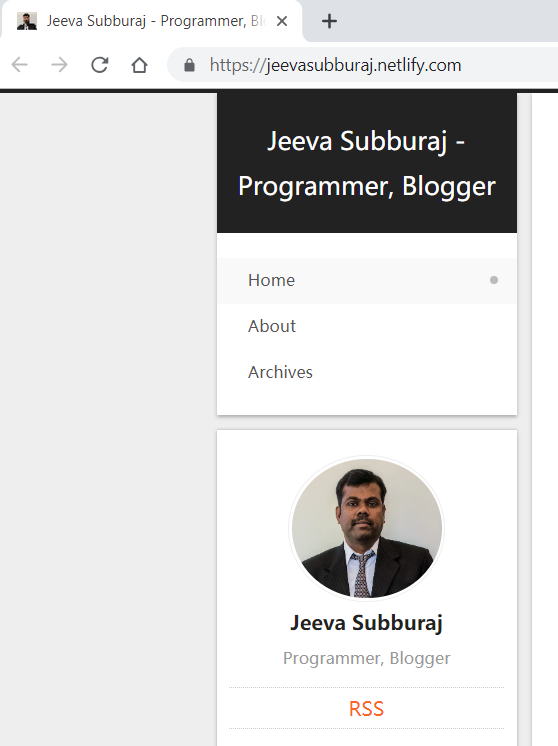
This will start deployment process and publish the blog in netlify with some random subdomain URL. You can change the random name with meaningful subdomain name in Netlify account if needed.
Every time when we push the changes to github repository, it triggers the build automatically to deploy it. Very Cool!!
Set up the custom domain name for the blog
We have now successfully completed setting up the static web site using hexo and netlify, its time to set up our custom domain for our blog. I purchased my domain with google domains and it costs 12$ per year. You can go with any domain service that works well for you.
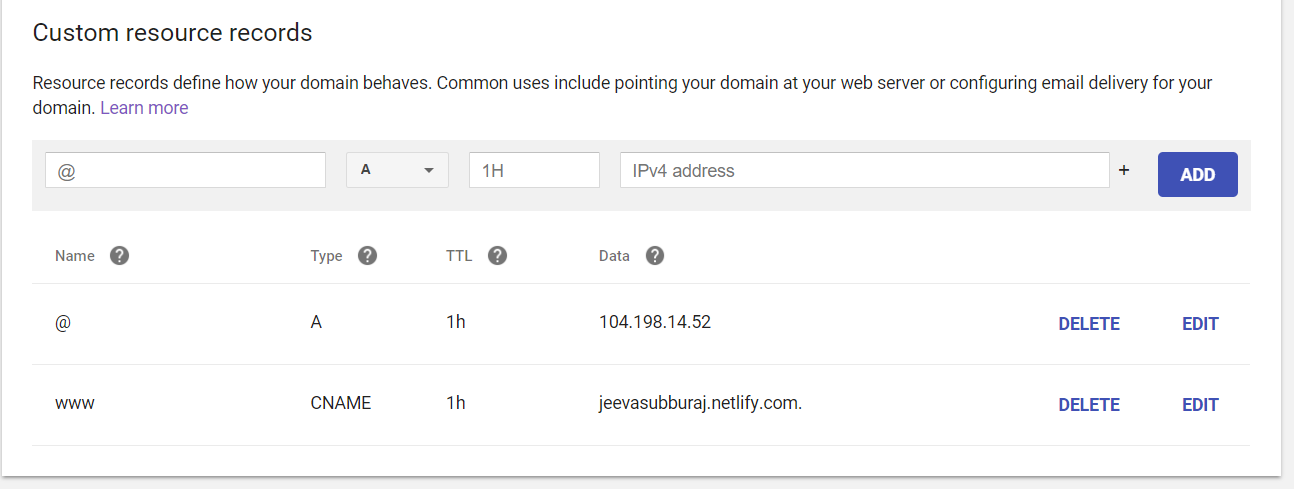
In my google domain account, i have to create A record with Netlify load balance IP and CNAME record with Netlify alias name. That’s it.
We are done with all the steps and my blog is now ready to serve.
Conclusion
This articles covers the basics of how to create a personal blog site using hexo static html generator framework and deploy it to netlify automatically using continuous deployment. I created this blog entry using typora editor and its so easy to create article with no hassle. Overall, i am happy with the decision of moving my blog from blogger to hexo. What are your thoughts?